2. Initial System Configuration
This chapter provides step-by-step instructions for the initial configuration of your OPERATIONS MANAGER.
By default, all interfaces are enabled. The unit can be managed via WebGUI or by command line interface (CLI).
-
Accessing the Management Console via Browser (WebGUI)
-
Accessing the Management Console via CLI
-
Changing the default Administrator password
-
Changing network settings
2.1 Default Settings
The OPERATIONS MANAGER comes configured with a default static IP Address of 192.168.0.1 Subnet Mask 255.255.255.0.
The OM offers a WebGUI via web browser that supports HTML5.
-
Type https://192.168.0.1 in the address bar. HTTPS is enabled by default.

-
Enter the default username and password
Username: root
Password: default
-
After the first successful login you will be required to change the root password.
-
Next, you will be presented with the ACCESS > Serial Ports page that shows you a list of serial devices and links to a Web Terminal or SSH connection for each.
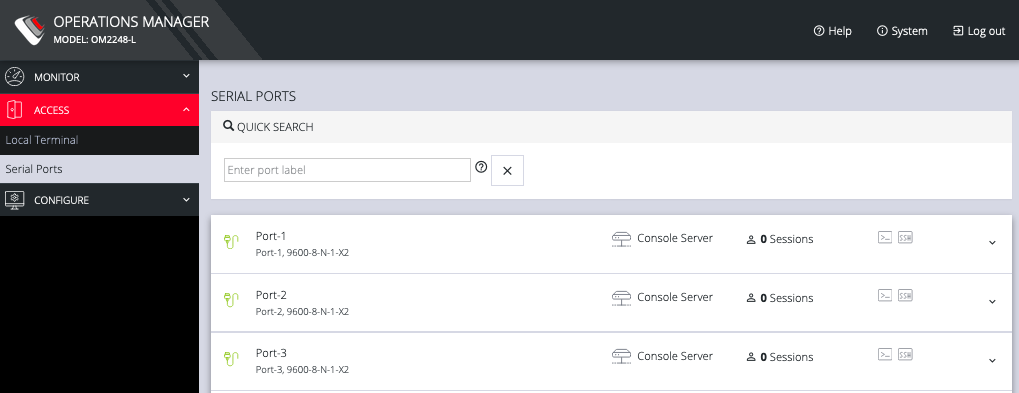
Using the WebUI
The WebUI can switched between Light or Dark mode by adjusting the toggle on the bottom left.

Light mode changes the user interface to display mostly light colors. This is the default UI setting. Dark mode changes the user interface to display mostly dark colors, reducing the light emitted by device screens.
The WebUI has three menu options on the upper right: Help, System, and Log out.
The Help menu contains a link to generate a Technical Support Report that can be used by Opengear Support for troubleshooting. It also contains a link to the latest Operations Manager User Manual.
The System menu presents the Current version, REST API version, Hostname, Serial Number, Model, and Current user.

2.2 Management Console Connection via CLI
The Command Line Interface (CLI) is accessible using your preferred application to establish and SSH session.
-
Input the default IP Address of 192.168.0.1. SSH port 22 is enabled by default.
-
When prompted, enter the login and password in the CLI
-
After a successful login, you’ll see a command line prompt
2.3 Changing the root password
For security reasons, only the root user can initially log into the appliance. Upon initial login the default password must be changed. To change the password at any time,
-
Click CONFIGURE > User Management > Local Users

-
Click the Edit User icon under Actions.

-
Enter a new password in the Password field and enter it again in the Confirm Password field.
-
Click Save User.
2.4 Disabling a root user
NOTE: Before proceeding, make sure that another user exists that has the Administrator role or is in a group with the Administrator role. For information on creating, editing, and deleting users, see Chapter 5.5.2 Local Users.
To disable a root user:
-
Click CONFIGURE > User management > Local Users
-
Click the Disable User button in the Actions section next to the root user.
-
Click Yes in the Confirmation dialog.
To enable root user, log in with another user that has the Administrator role and click the Enable User button in the Actions section next to the root user.
2.5 Changing Network Settings
The interface supports both IPv4 and IPv6 networks. The IP address of the unit can be setup for Static or DHCP. The following settings can be configured for network ports:
-
IPv4, IPv6
-
Static and/or DHCP
-
Enabling or disabling network interfaces
-
Ethernet Media types
To add a new connection:
-
Click CONFIGURE > Network Connections > Network Interfaces

-
Click the arrow to the right of the desired interface.
-
Click the plus icon to open the New Connection page.
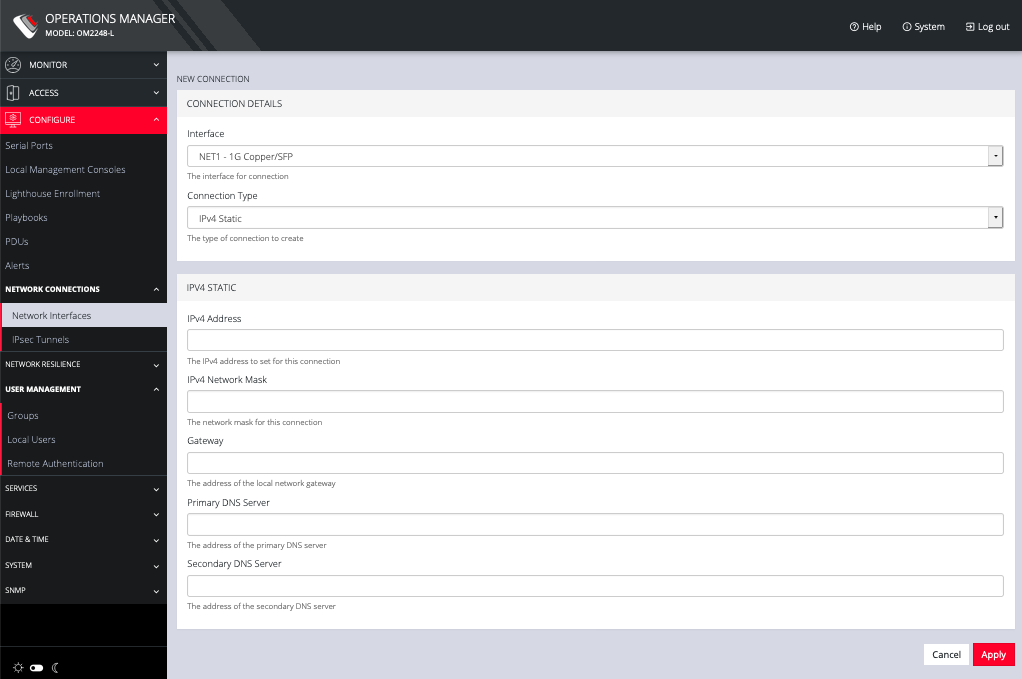
-
Select the Interface and Connection Type for your new connection.
-
The form on the bottom part of the page will change based on the Connection Type you choose. Enter the necessary information and click Apply.
To Disable, or Delete interfaces, use the controls on the expanded section on the CONFIGURE > Network Connections > Network Interfaces page.
NOTE: If you experience packet loss or poor network performance with the default auto-negotiation setting, try changing the Ethernet Media settings on the OPERATIONS MANAGER and the device it is connected to. In most cases, select 100 megabits, full duplex. Make sure both sides are set identically.
To change the Ethernet Media Type:
-
Click CONFIGURE > Network Connections > Network Interfaces
-
Click the expand arrow to the right of the interface you wish to modify.

-
Click Enabled Automatic.

-
Change the Ethernet Media Type setting as needed and click Apply.
2.6 Configuring Serial Ports
For information on configuring serial ports, see Chapter 5.1 Serial Ports.