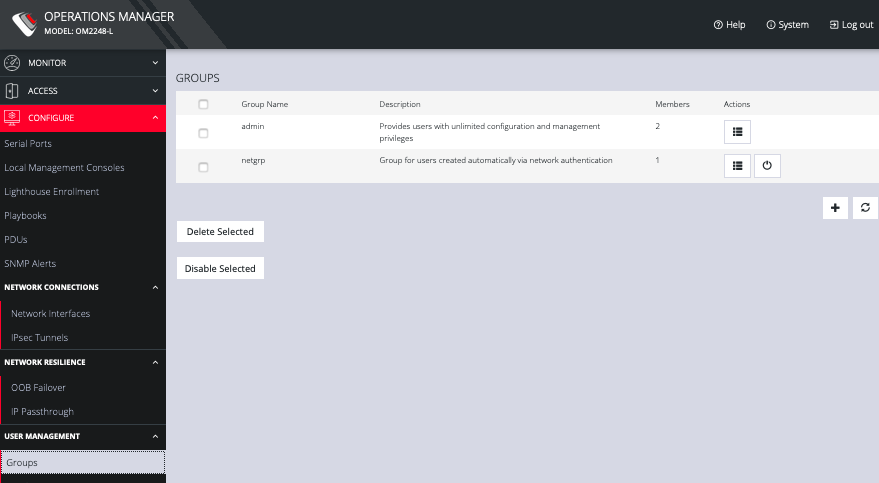
Groups
CONFIGURE > USER MANAGEMENT > Groups
To create a new group:
-
Select CONFIGURE > USER MANAGEMENT > Groups.
-
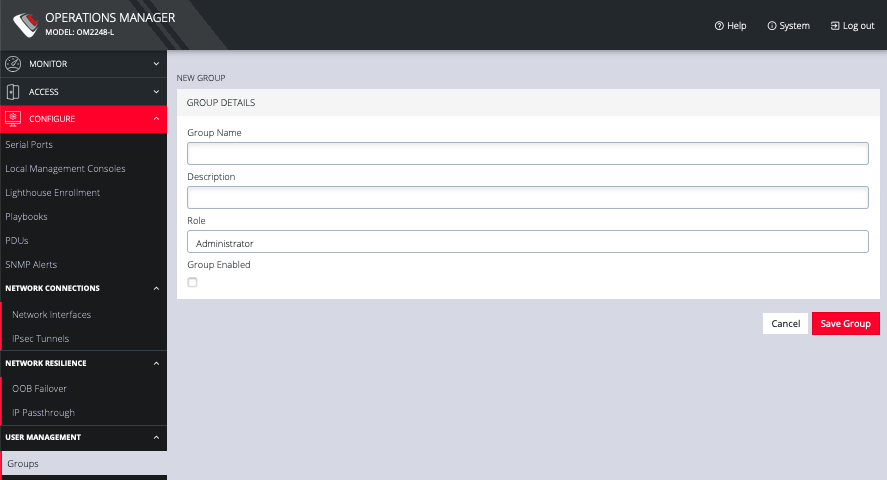
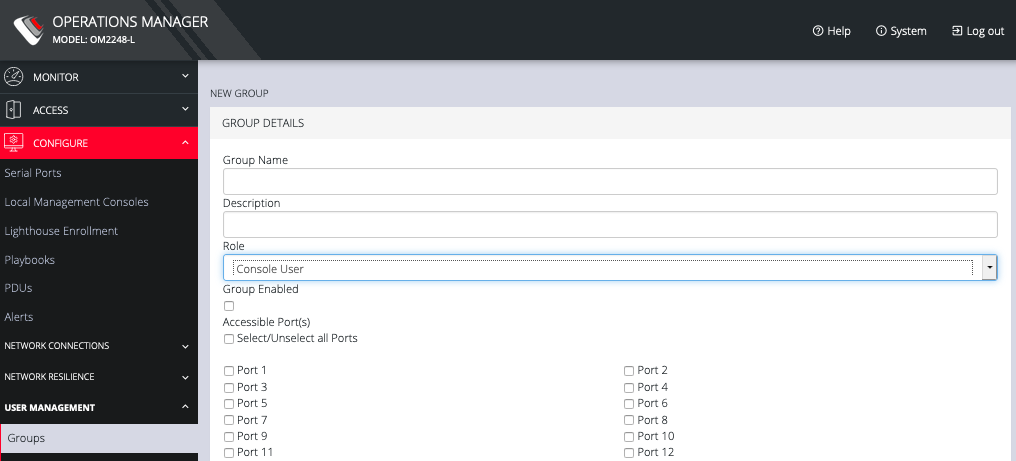
Click the Plus button. The NEW GROUP page opens.
-
Enter a Group Name, Description, and select a Role for the group.
-
Choosing the Console User role allows you to select specific ports this group will be able to access.
-
Click the Group Enabled checkbox to enable the group. After creation, groups can also be enabled or disabled from the CONFIGURE > USER MANAGEMENT > Groups page.
-
Click Save Group.
Note: Group Name is case sensitive. It can contain numbers and some alphanumeric characters. When using remote authentication, characters from a user's remote groups that are not allowed are converted to underscores during authentication. Local groups can be created that take that into account, allowing the authentication to continue.
If the Role selected is Administrator, members of the group have full access to and control of all managed devices, full system configuration privileges, and full access to the command line shell.
To modify an existing group:
-
Select CONFIGURE > USER MANAGEMENT > Groups.
-
Click Edit in the Actions section of the group to be modified and make desired changes.
-
Click Save Group.
The CONFIGURE > User Management > Groups page also allows administrators to delete a group. Users who were members of the deleted group lose any access and administrative rights inherited from the group.
Note: The netgrp group is inherited as the primary group for all remote AAA users who are not defined locally. By default, netgrp has the Administrator role and is disabled. It must be enabled to take effect for remote AAA users.