Uh oh, time for out-of-band
Our virtual demo has proven immensely popular as a way for new users to learn about the many and varied capabilities of our products, but let’s face it – first time you log in to an Opengear and see all those features laid out in front of you, it can be a little overwhelming.
This is the first in a series of posts to demo some of the features of our demo (yo dawg, I heard you like demos), so go ahead and open up a new browser tab to http://demo.opengear.com, and let’s get started.
Launching the demo
First, fill in a few details about yourself and click Start Demo. Each online demo starts a freshly created virtual Opengear box that boots up and runs in the cloud with a unique IP address, for the demo’s hour long duration.
It’ll be up and running in a minute or two. If you supplied your real email address (of course you did, right?) a link to your virtual Opengear’s IP will land in your Inbox when it’s ready – otherwise sit tight and your browser will refresh with the link.
Your virtual Opengear is pre-configured with some user accounts and managed devices (a router, switch, UPS and PDU) for convenience – but do note that owing to the virtual nature of the demo, these devices are simulated by scripts and dummy drivers. But we think it’s close enough to the real thing to give you a feel for how our Data Center and Remote Site Management products work.
Follow the link to start the tour..
Consoles in your browser
Login as administrator / default and you’re presented with the admin group view of the Opengear GUI. This GUI runs inside each Opengear product and is an easy to use interface to configure your Opengear, monitor logs and status, and control managed devices (however, many users prefer the CLI for the latter – more on that in a minute).
On the lower left hand side of the screen, click Manage -> Devices -> Serial to view the serially connected devices pre-configured for this demo (if you want to explore that configuration in depth, that’s under Serial & Network -> Serial Port).
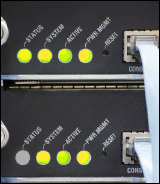
To launch a console management session, click the Web Terminal icon ![]() for Router.
for Router.
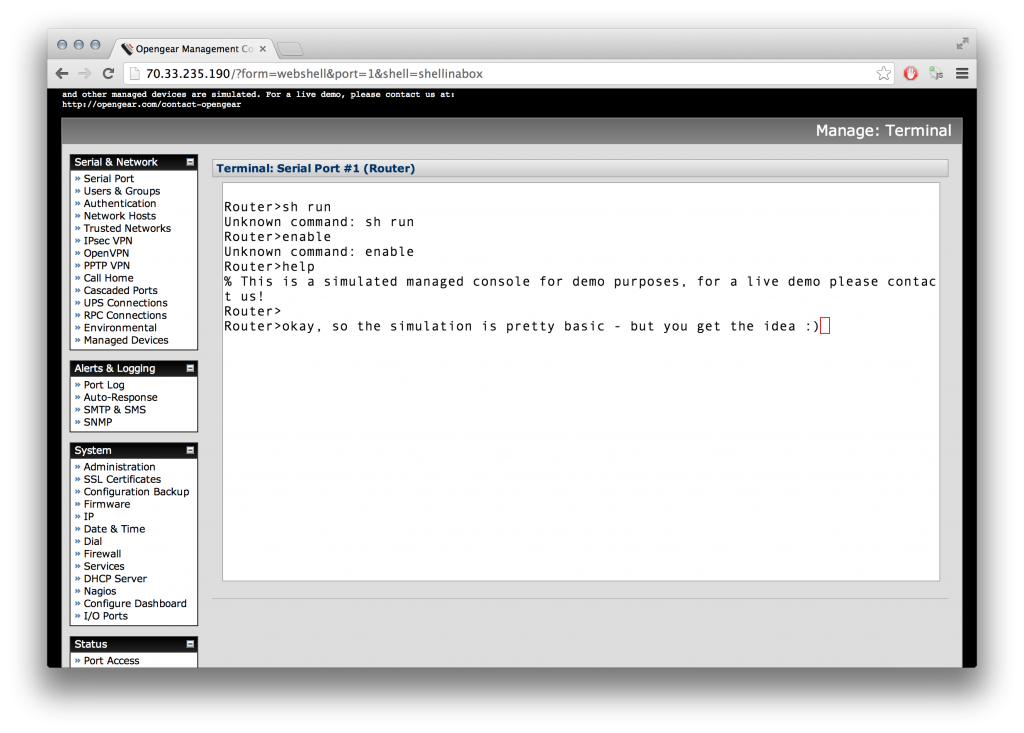
This starts the Opengear’s built-in AJAX console client, connected to the managed router via serial. The Opengear doesn’t send any characters or signals when you connect, so hit enter to get a prompt back from the managed router.
And hey presto, out-of-band management! Now you can fat finger configs and yank network cables with (almost) complete impunity! Except that this virtual demo isn’t quite sophisticated enough to let you do that – you’ll need to book a live demo for that.
Consoles your way
While Web Terminal is handy, most Opengear users have their preferred full-featured client for connecting to managed devices at the CLI level, clients like PuTTY, SecureCRT, MobaXterm or OpenSSH. If that sounds like you, fire up your favourite SSH client. I’m using SecureCRT.
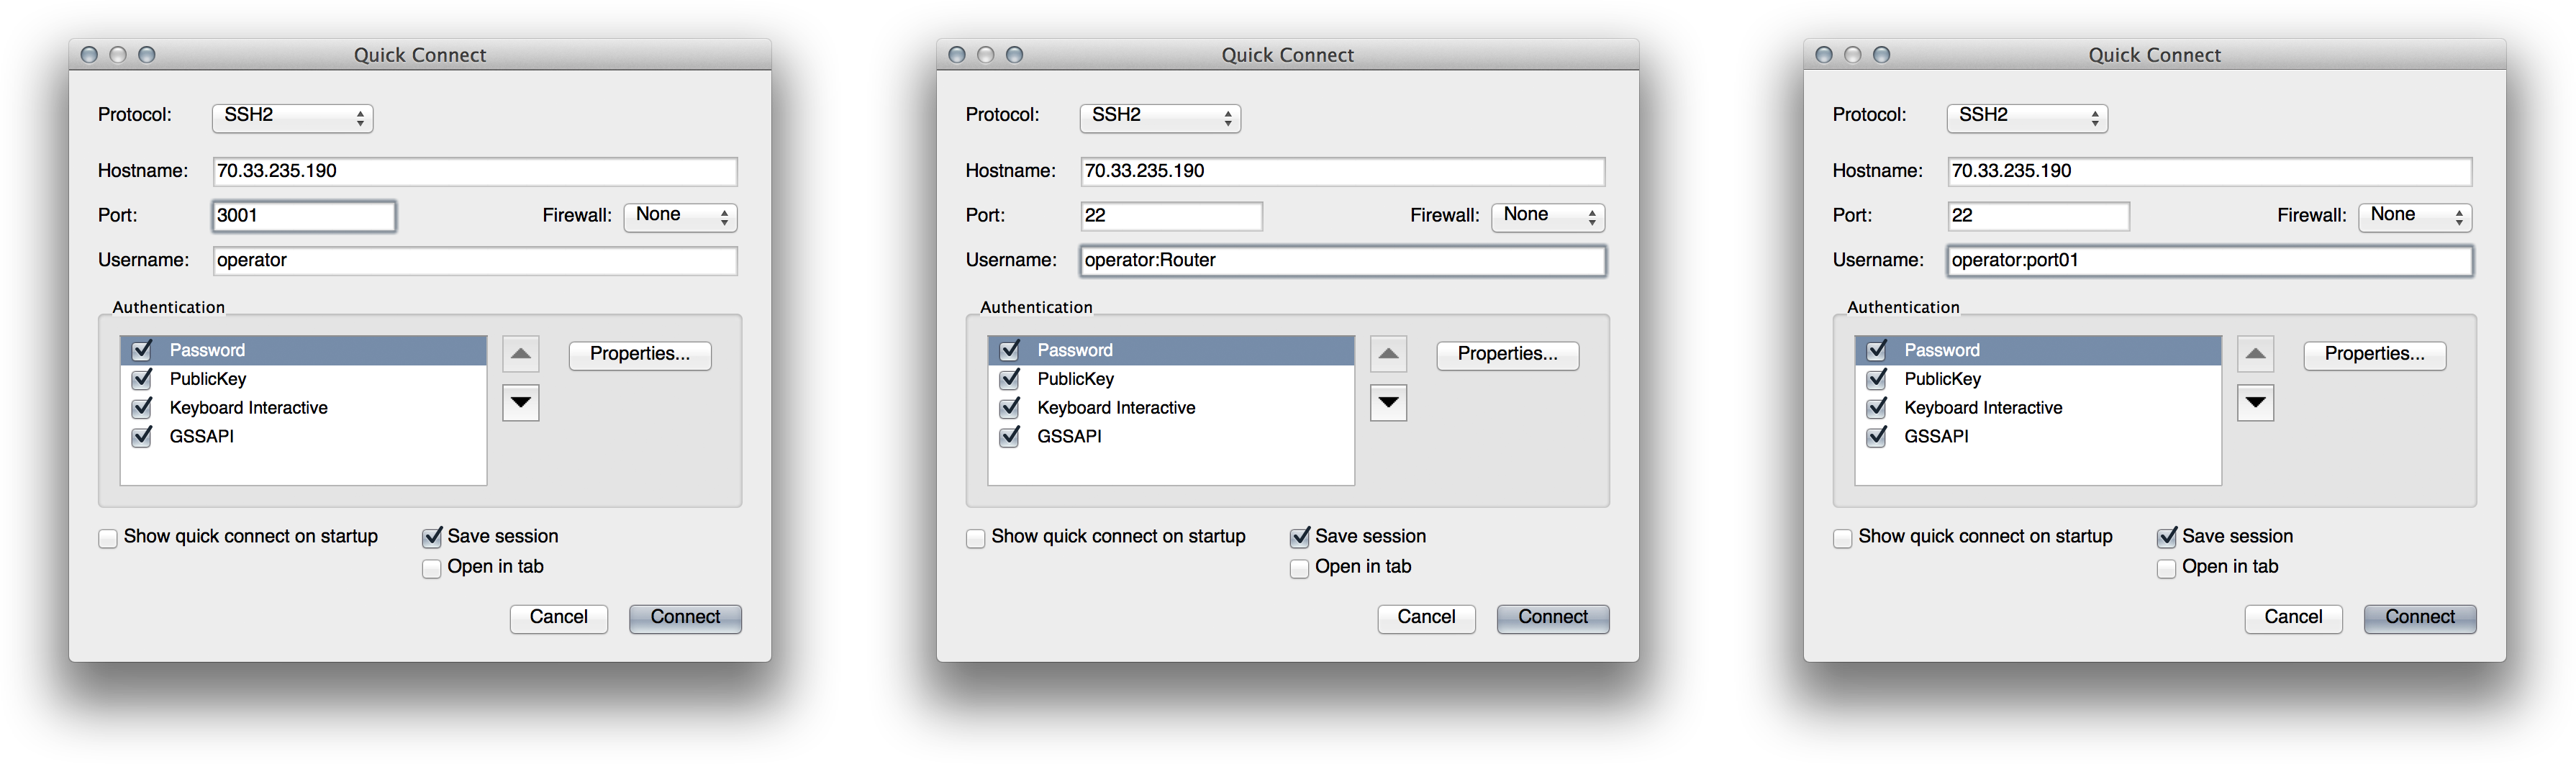
There are a few ways to get directly to your consoles via SSH, let’s use the operator / default account, which is an example every day, non-admin user.
- “Reverse SSH” style, connecting to TCP port 3000 + the Opengear’s serial port number (that’s 3001 for Router)
- SSH to the Opengear’s default SSH port (TCP port 22), and login with a specially crafted login of the username followed by a colon “:”, followed by the port label (operator:Router)
- .. or login with username colon canonical port name (operator:port01)
Here’s what these three ways to connect look like in the SecureCRT connect screen:
If you’ve still got the Web Terminal open you’ll notice the SSH session trail is visible there too, since Opengear supports concurrent console sessions by default.
Console chooser menu
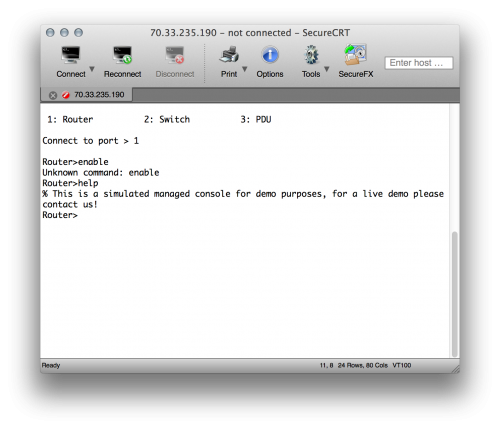
Another way to reach your consoles is connecting is via the pmshell chooser menu, which is part of Opengear’s built-in portmanager subsystem. portmanager converts serial data to and from network data, enabling access your serial consoles using network protocols such as SSH and Telnet. It also enforces permissions as to who can access which ports, and interfaces with Opengear’s logging and Auto-Response alerting & automation subsystems.
The chooser menu prompts you with a list of all the serial ports currently configured in Console Server mode. There are three ways to get to the chooser:
- SSH to the Opengear’s default SSH port and login with username colon serial (operator:serial)
- For a user in the users or admin group (like operator and administrator are), login with username and password to reach the Opengear’s CLI, then type: pmshell
- For a user in the pmshell group, login with username and password, and the menu automatically loads
To disconnect the session, hit enter, hit tilde, then hit period/full stop:
Going commando
If you’re using a command line ssh client e.g. OpenSSH from an OS X or Linux terminal, here are the one liners that replicate the console access methods discussed above (replace 70.33.235.190 with your demo’s IP address):
# SSH to serial port 1 by TCP port
ssh -p 3001 -l operator 70.33.235.190

# SSH to serial port labelled Router
ssh -l operator:Router 70.33.235.190

# SSH to serial port 1 by port name
ssh -l operator:port01 70.33.235.190

# SSH to console chooser menu
ssh -l operator:serial 70.33.235.190
Also be aware that to trigger the pmshell escape commands via OpenSSH you need an extra tilde, so to disconnect:
Wrap up
That’s it for the first part of our tour, next time we’ll cover advanced pmshell usage including sending serial break e.g. to enter ROMmon, and the pmshell power menu e.g, for remote reboot of managed devices when the equipment connected to the console’s not responding.