 Welcome to the second instalment in this series of articles about our online virtual demo, where we’ll start to dig deeper into Opengear’s advanced features. In part 1, we explored the various ways of reaching its virtual serial ports to try out out-of-band console management.
Since then, we’ve updated the online demo to our latest firmware release (3.12) which brings with it a host of new features. One of these is our all new Manage Devices UI that allows you to take advantage of the advanced capabilities of the Opengear’s vendor-neutral power management subsystem, via a simple to configure, easy to use browser interface.
What is vendor-neutral power management?
Vendor-neutral power management simply means your Opengear appliance has built-in capabilities to monitor and control power devices (such as switched PDUs, UPSes and IPMI-enabled servers) from over 100 vendors, including Eaton, Raritan, APC and Server Technology, via serial, network (directly or routed) or USB.
Remote power management is nothing new and in many ways critical to any remote management solution, but Opengear’s unique vendor-neutral approach means you’re not locked in to a specific PDU brand or inflexible, feature-limited and often expensive all-in-one solution. This means you can:
- Retrofit your existing remote site switched PDUs for remote management and out-of-band control
- Support mixed-vendor data center or distributed environments with a single point of monitoring and control
- Choose a best-fit power solution + a best-fit remote management solution, without having to compromise on either
Remote power management encompasses remote access, remote monitoring and remote control of PDU and UPS power equipment – for this demo we’ll focus on control (remote reboot) of a managed PDU.
Demo time!
Before continuing, fire up a demo at http://demo.opengear.com and login as: administrator / default
Getting connected
Opengear appliances are built for remote device management, so the concept of a Managed Device is an important one. To your Opengear, a managed device is a grouping of one or more of low-level connections.
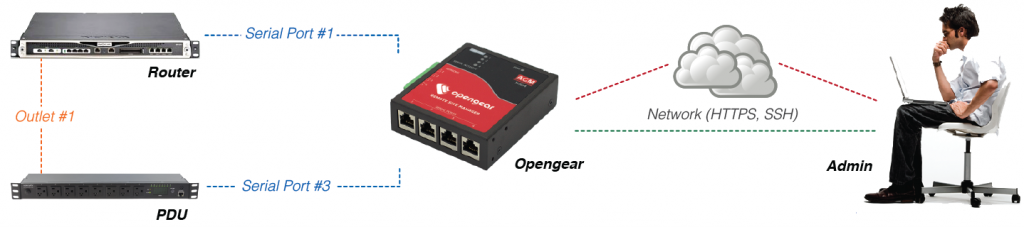
For example, let’s take a look at how the managed device Router is configured. Click Serial & Network -> Managed Devices. Router has an out-of-band serial console connection on Opengear serial port 1, and we’ve told the Opengear that Router is powered by the managed PDU’s first power outlet (multiple outlet connections are also supported).
The control link between the Opengear appliance and the PDU is configured under Serial & Network -> RPC Connections (an RPC is a Remote Power Controller that allows for remote power control, i.e. a switched PDU or server IPMI interface). It’s also here where you select the vendor, model and connection path, e.g. the PDU’s console is connected to Opengear serial port 3.
Now the Opengear has out-of-band control of the Router’s console and power connections, let’s get rebooting!
Taking control
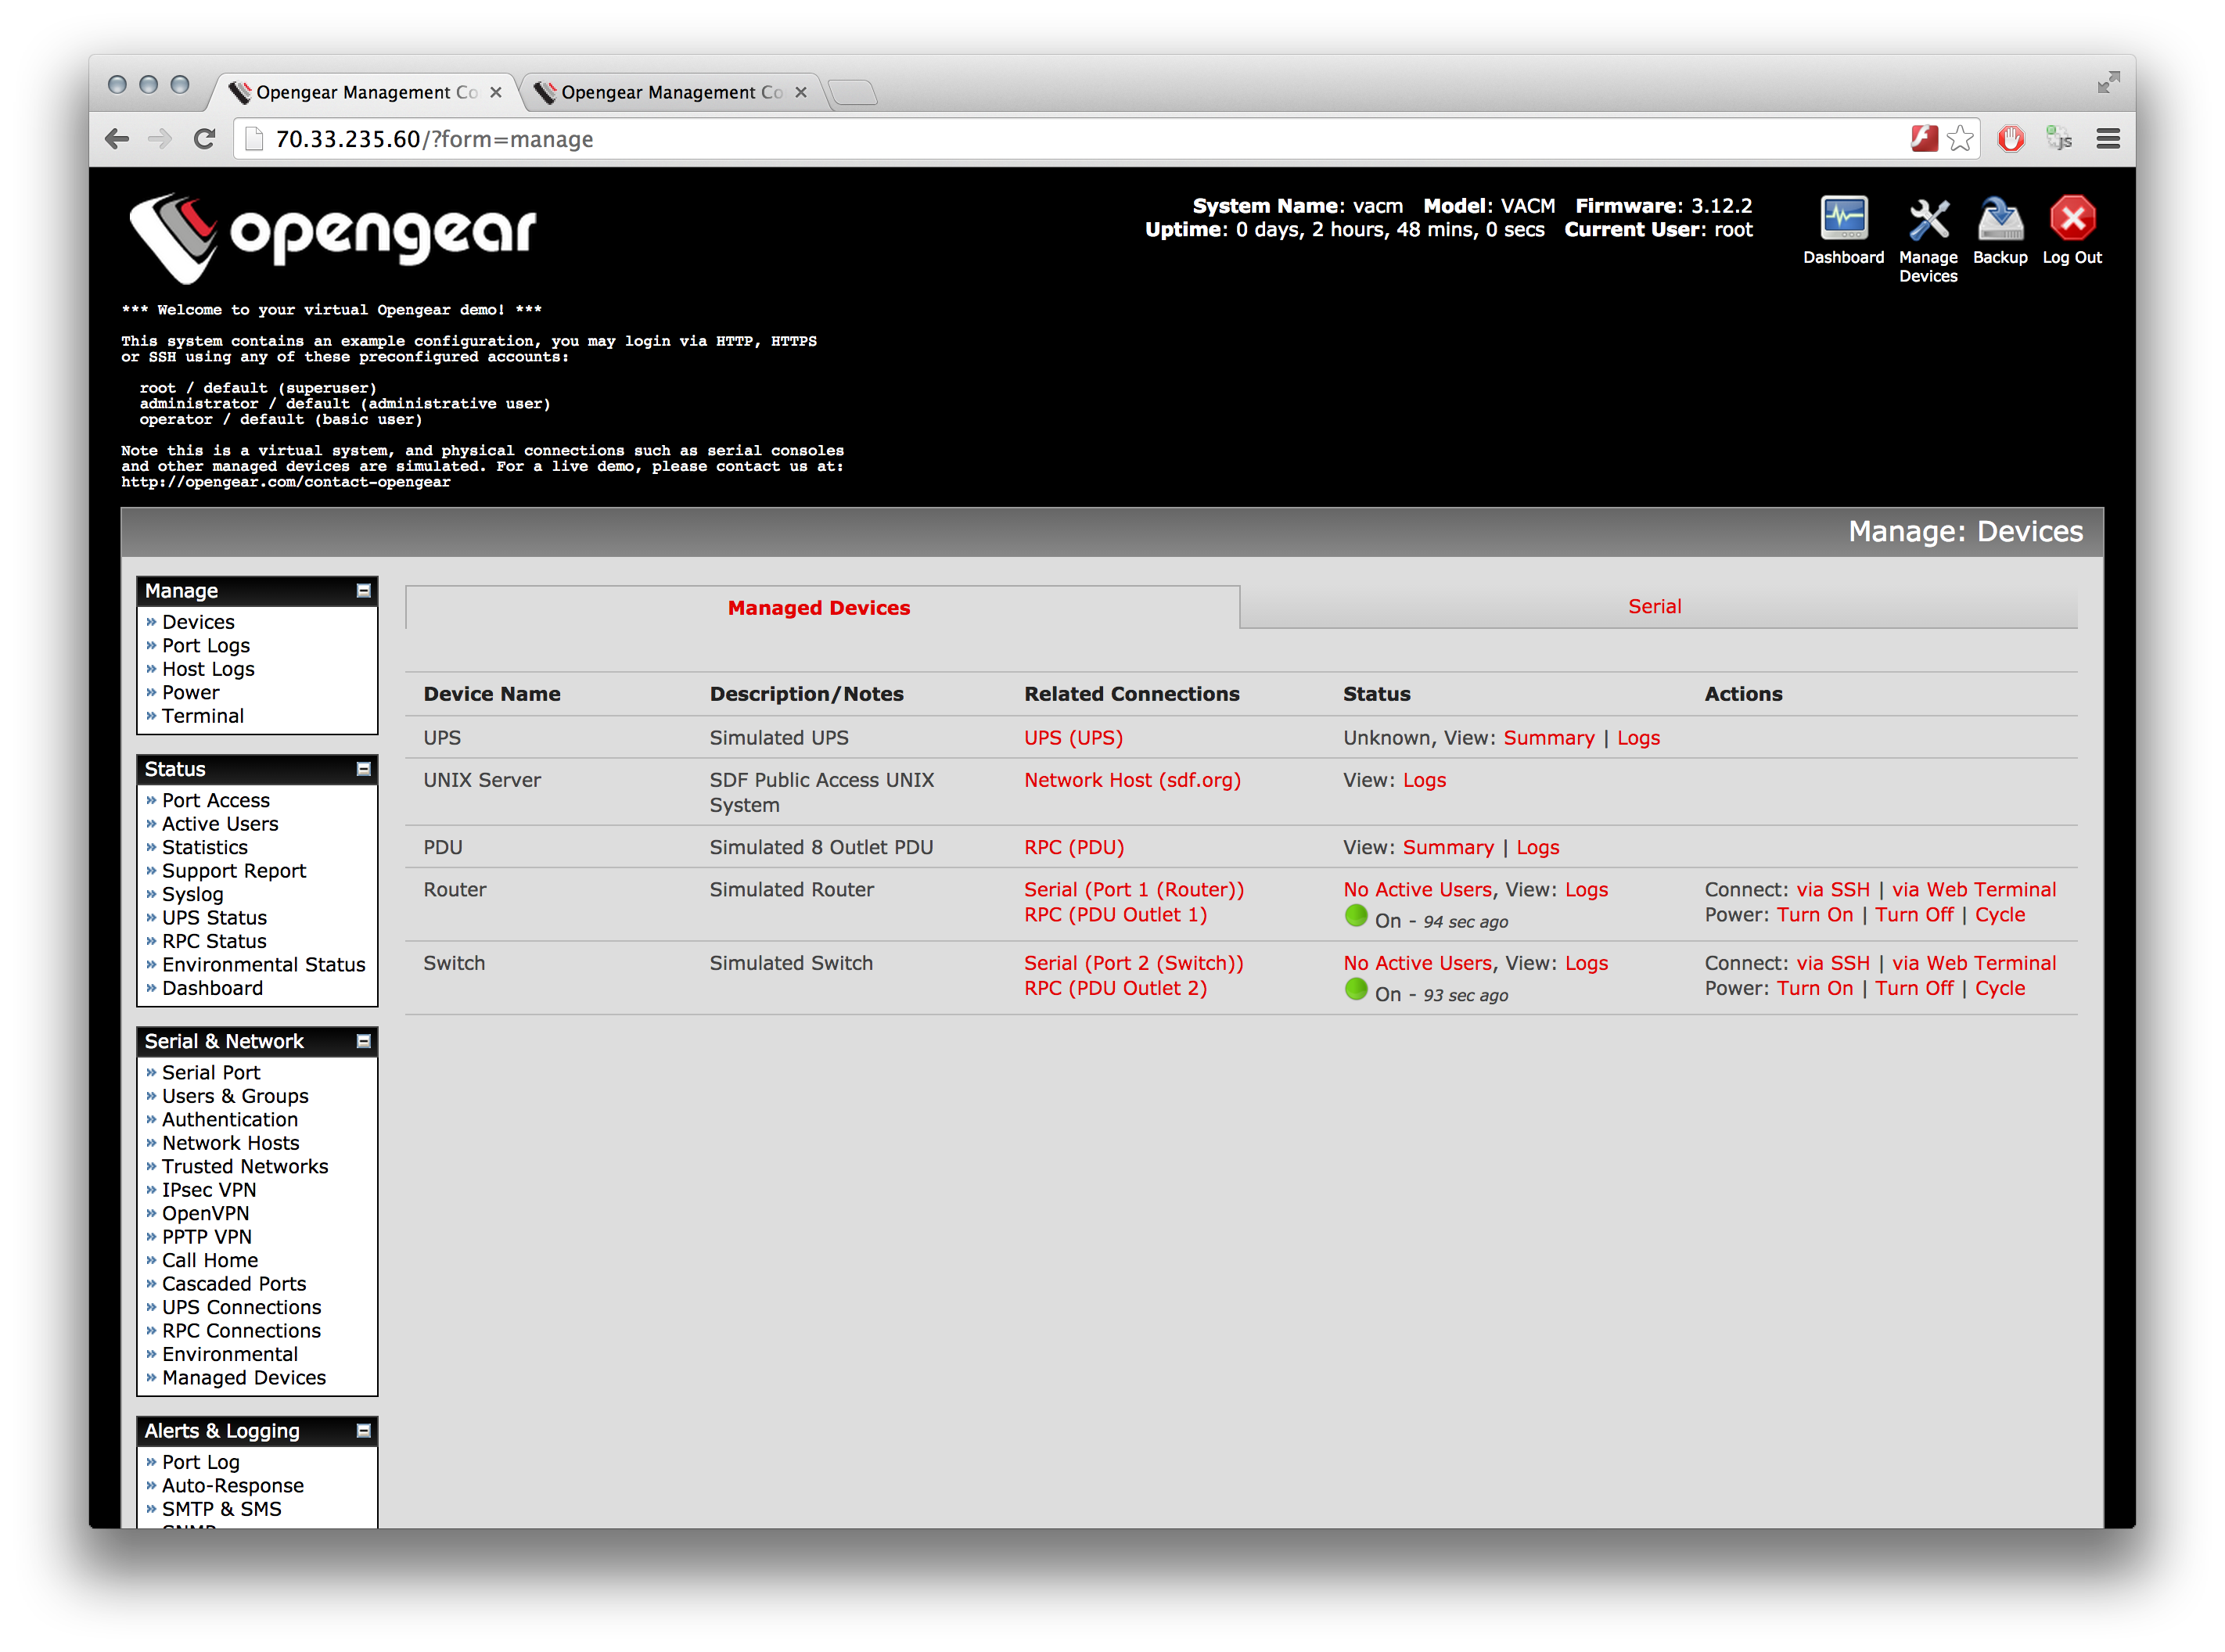
Click the Manage Devices shortcut icon in the top right of your screen. Here you can see each of the Managed Devices listed alongside their current Status, and a number of Actions you can use to manage them.
Locate the row for Router, right click Connect: via Web Terminal, and open it in a new window. This launches a console connection to the Router inside your browser (or perhaps you’d rather use your preferred native SSH client – see Consoles your way in part 1 of the demo tour).
Type a few commands at the Router to get a feel for a console session (however it doesn’t understand much being a simulated device!). Now from inside the console session, let’s power Router down:
- Hit <enter>
- Hit ~
- Hit p
Power Commands:

 O - Power ON
 P - Power OFF
 R - Power cycle off then on again
 s - Show current power status
 . - Exit power menu
 ? - Show this message

[Router] Power >
The Opengear prints a power control menu inside your console session. To power off select P then <enter>, and leave the menu with . then <enter>.
Return to the Manage Devices window, leaving the Web Terminal open. Click the Managed Devices tab to refresh status – now there’s 1 Active User (your Web Terminal session), and its Power status has changed to Off.
Let’s power Router back up from the Manage Devices UI. Under the Router’s Actions, click Power: Turn On, then click OK to confirm.
Return to the Web Terminal window, where you can watch Router boot up again.

Resilient infrastructure management
From this quick demo you can start to appreciate how out-of-band power control + out-of-band console management is an essential safety net for any critical IT/network infrastructure install.
Combine this with out-of-band remote access via the Opengear’s built-in 3G and 4G LTE cellular, and you’ve got complete control to recover from LAN and/or WAN failure within minutes – wherever, whenever.
And we all know things tend to go badly wrong at the worst possible “whenever” and “wherevers”, whether it’s 5 minutes to Friday close of business, during peak load for a hosted application, or in the middle of your kid’s football match. So it’s important to have resilient remote management in place before disaster strikes.
Next instalment we’ll look at how to use our built-in Auto-Response automation system to proactively detect infrastructure faults, and how smart alert escalation and auto-remediation can prevent downtime even while you’re sound asleep.